Open your AI character and add all necessary components as follow:
Hit Reaction
Hit Box
Parry Attack
Enemy AI
AI Perception
AI Perception Stimuli Source

Add actor tag names and adjust each component details as described in the previous modules.
The tag name “ReceiverEnemy” is used to enable AI character to receive threat alerts. Make sure you add it!

Next step we have to add “BI Lockon Interface” and if you are using GASP we need to add “BI Smart Link Interface”

In order for the lock on UI to show in gameplay, we have to add the Lockon Widget to the AI character and set “WBP_TargetWidget” in the widget class.

Next step is to set the widget in the Lockon interface.

Do the same steps for “Stats Widget”.
Note: Make sure all widgets are set no collision otherwise the characters can step on them.
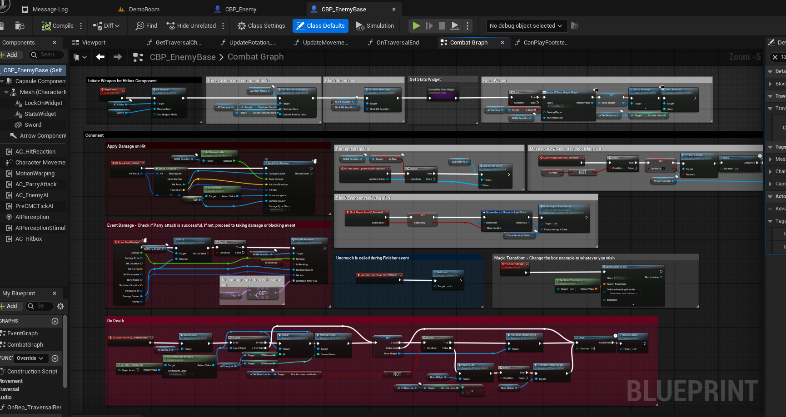
Final step is to copy all events located in Combat Graph to your new AI character. They are self explanatory such BeginEvent where we set all initial values, event point damage and other important events.
If you are using GASP, you will need to add these events to your character as they are responsible for it mobility.

When it comes to threat alert awareness, you can send alert from any actors using “Send Alert” function or “BP_SendAlert_Notify” make sure you assign level of the threat.

