Create Interactable Actor
You have two Options:
Make a Child of SP8_InteractableActor_PickUp.
Create a new Blueprint without a Template.
I will explain both!
Make a Child of SP8_InteractableActor_PickUp
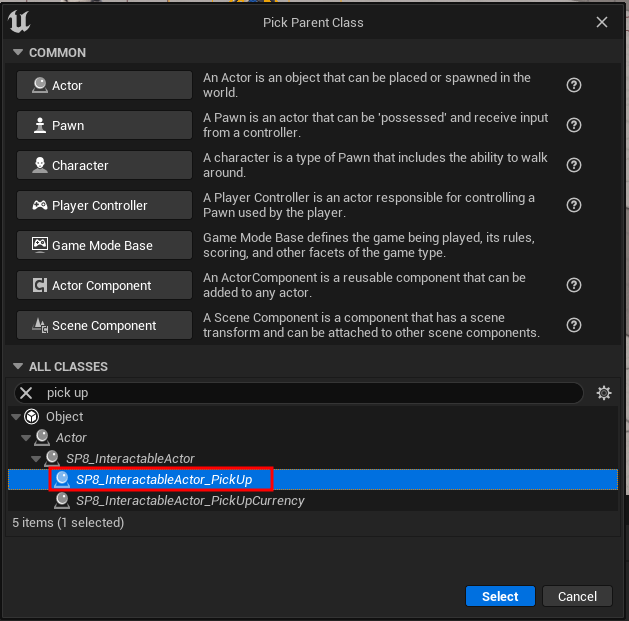
1. Create a new Blueprint and select as Class SP8_InteractableActor_PickUp.
Do not forget to set the Interaction Profile inside the Blueprint SP8_InteractableActor like descriped inside this Tutorial, if you haven’t done it yet!
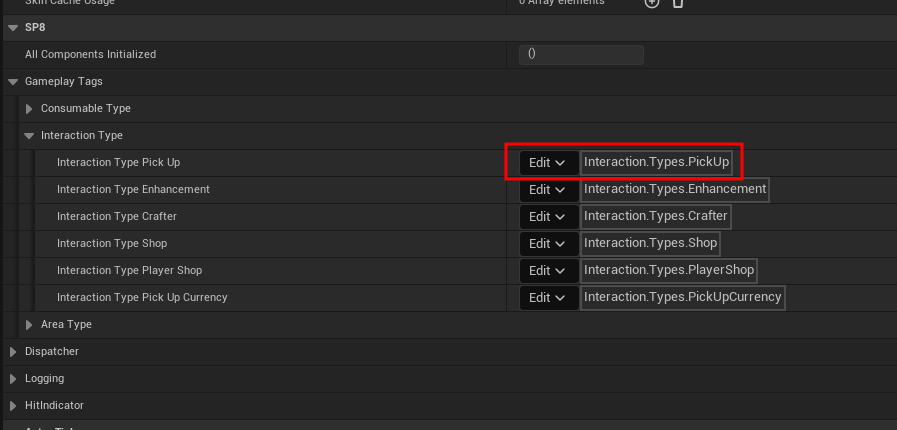
2. Create a new GameplayTag and call it Interaction.Types.PickUp.
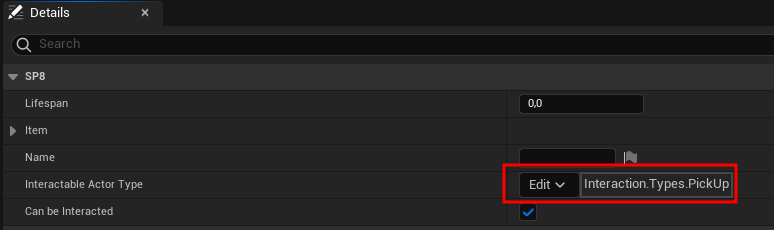
3. Open your new Blueprint and go to the Class Defaults and set your Interactable Actor Type to your new Gameplay Tag.
Create a new Blueprint without a Template
1. Follow this Tutorial.
2. Add the Interface SP8_BPI_Interaction_PickUpItem like you added the SP8_BPI_Interaction.
3. Create a new GameplayTag and call it Interaction.Types.PickUp.
4. Edit the following Interface Functions:
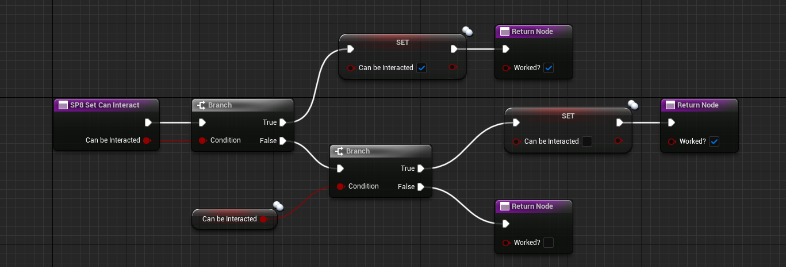
SP8_SetCanInteract: Create a new Variable and call it canBeInteracted [Bool]. Set this Variable inside this Function. The Variable should be replicated! Also return true, if it worked!
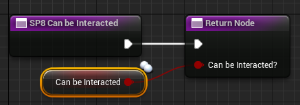
SP8_CanBeInteracted: Return the Variable canBeInteracted.
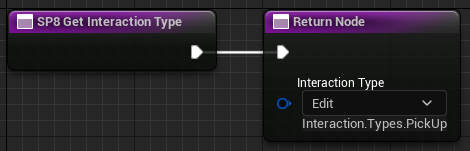
SP8_GetInteractionType: Return the Gameplay Tag Interaction.Types.PickUp.
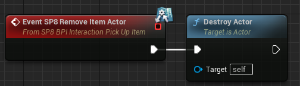
SP8_RemoveItemActor: Destroy the Actor (Should be Replicated)
SP8_GetItemSlot: Return the Item, which can be picked up. Create a new Variable [SP8_S_SlotItem] and set Instance Editable and Expose on Spawn to true. Return this Variable.

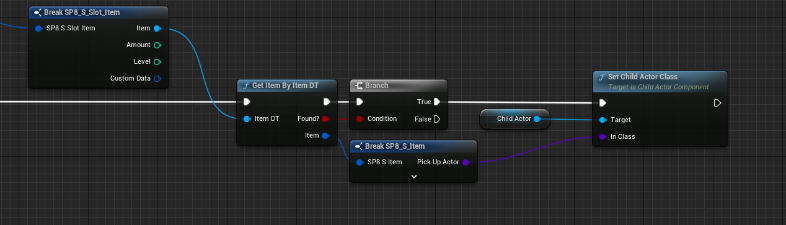
Of course you should now set your Child Actor to the Actor of the Item.
That’s the Blueprint inside the SP8_InteractableActor_PickUp (Construction Script):
Add the Actor to your Level
1. Simply drag and drop your Blueprint into your Level.
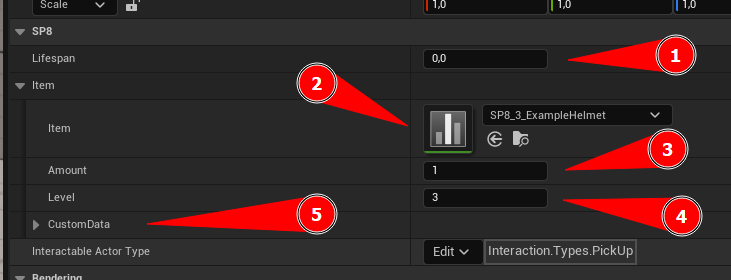
2. Click inside the Outliner of the Level on your Blueprint and inside the Details Panel edit following:
(1) Lifespan: Set after how many seconds the Actor should get destroyed. 0 will not destroy the Actor.
Item: Set the Item you want to pick up.
(2) Item: Set the Data Table of your Item.
(3) Amount: How much of the Item will get added to the Inventory on Pick up.
(4) Level: What Level does the Item have.
(5) Custom Data: Read More!
In this example the Actor will display a Title like this: Example Helmet+3
If the Amount would be greater then 0, it will display the Amount before the Item as well.
Setup the Player
1. Without PlayerTemplate: You need to listen to the InteractedWithActor Dispatcher of the Interaction Component.
Inside there you need to do following:
(1) First of all check if the Interaction Type is Interaction.Types.PickUp.
(2) If yes, you need to Set Can Interact to false, so nobody can take it. Also check if it worked.
(3) If yes, you need to check if the SP8_BPI_Interaction_PickUpItem is implemented.
(7) If no, you need to set can Interact to true.
If yes, you need to get the Item Slot inside the Actor. Check if it worked.
(7) If no, you need to set can Interact to true.
If yes, Add the Item to the Inventory and check if it worked.
(7) If no, you need to set can Interact to true.
After that you can call Sp8_RemoveItemActor on the Interacted Actor.

2. With PlayerTemplate: Go inside your Player BP to Class Defaults and set the Variable Interaction Type Pick Up to the Gameplay Tag Interaction.Types.PickUp.
3. Listen to an Key Press, which you want to interact with this Actor.
Call InteractWithClosestActor on the Interaction Component and do following:
Interaction Type: Add Interaction.Types.PickUp
RunOnServer: Set to true, because Items can only be added on Server.
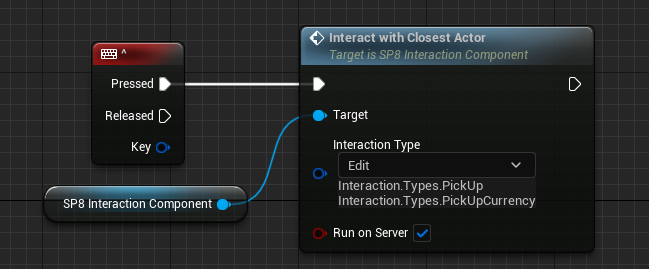
If you move now near your Pick Up Item Actor with your Player BP and you press (in this example) on the Key ^, you will Pick up the Actor.
Of course only if it is closer then a other Interactable Actor with one of the Types you put into this Function.