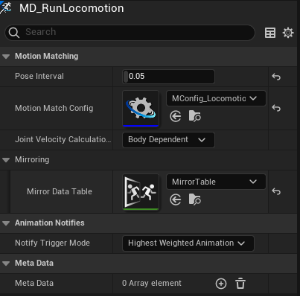
Initial setup of the motion data asset is done in the details panel as shown below. Follow the steps to ensure that your motion data is ready for editing.

Step 1: Set the ‘Pose Interval’ under the ‘Motion Matching’ foldout to a value of 0.05 - 0.1. This is the time interval between recorded poses in the animation database.
Step 2: Set the Motion Match Config property to the configuration asset you created in a previous section of this manual.
Step 3: Set the ‘Mirror Data Table’ to use with this motion data if you want to make use of runtime mirroring
This is all that is required for a minimal setup.
Note: If the preview character does not show up even after restarting the Motion Data editor, please open up the skeleton and ‘Apply’ the preview character mesh to the skeleton. The model should show up after doing this.
Continue with Adding Animations