Video Tutorial
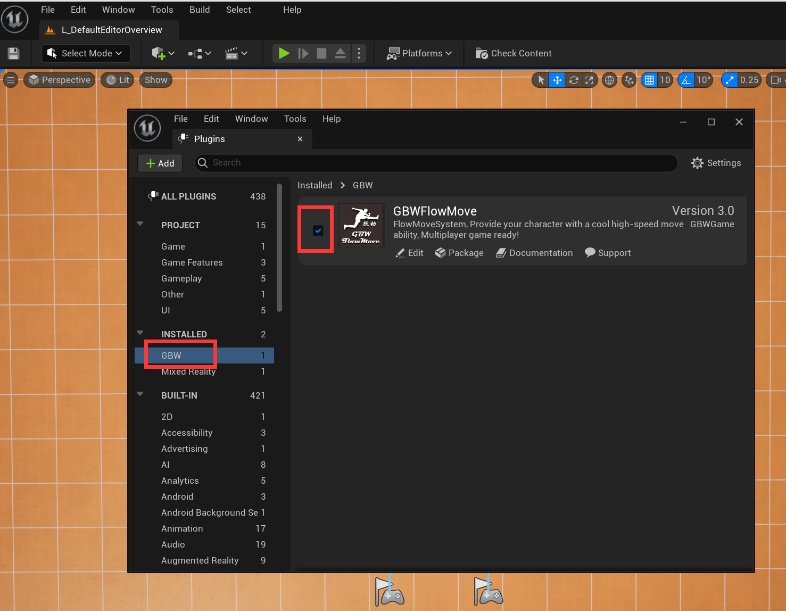
1、Open the Lyra project and enable the FlowMove plugin (close the Lyra project after enabling)
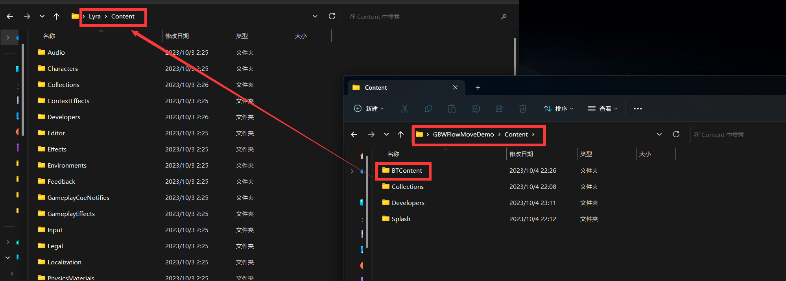
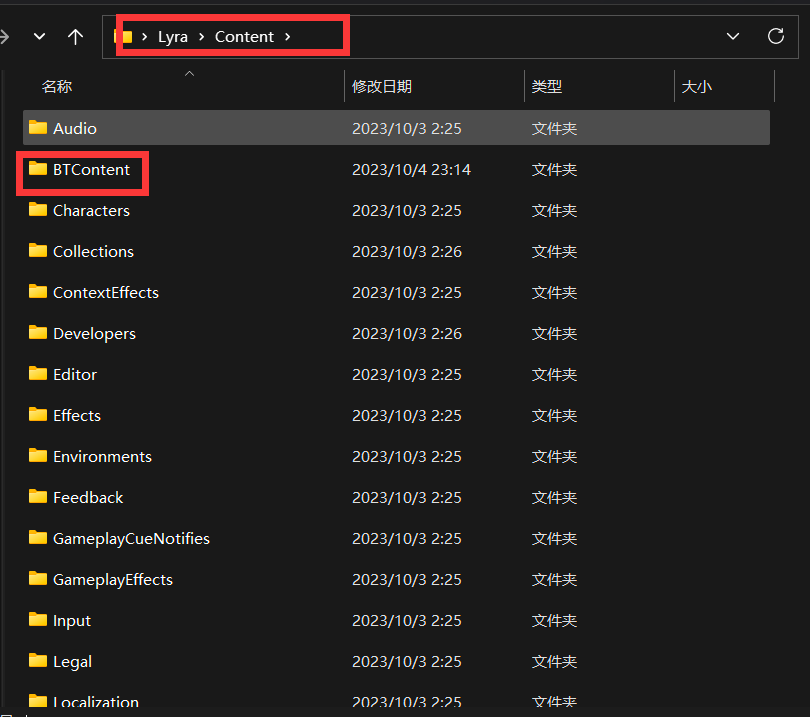
2、Copy the BTContent folder under the Content folder of the Demo project to the Content folder of the Lyra project
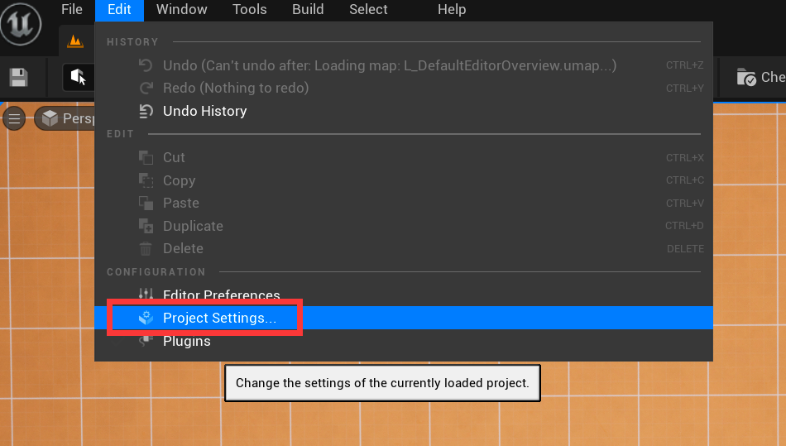
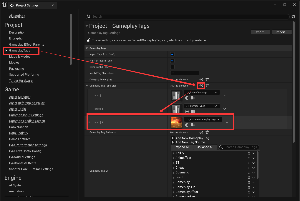
3、Reopen the Lyra project, locate the GameplayTags in ProjectSettings, add an element to the GameplayTagTableList configuration item, and set the value to "DT_ FMDemoGameplayTags "data table. Restart the project after the operation is completed (this is to prevent potential bugs in the UE editor's GameplayTag recognition from occurring).
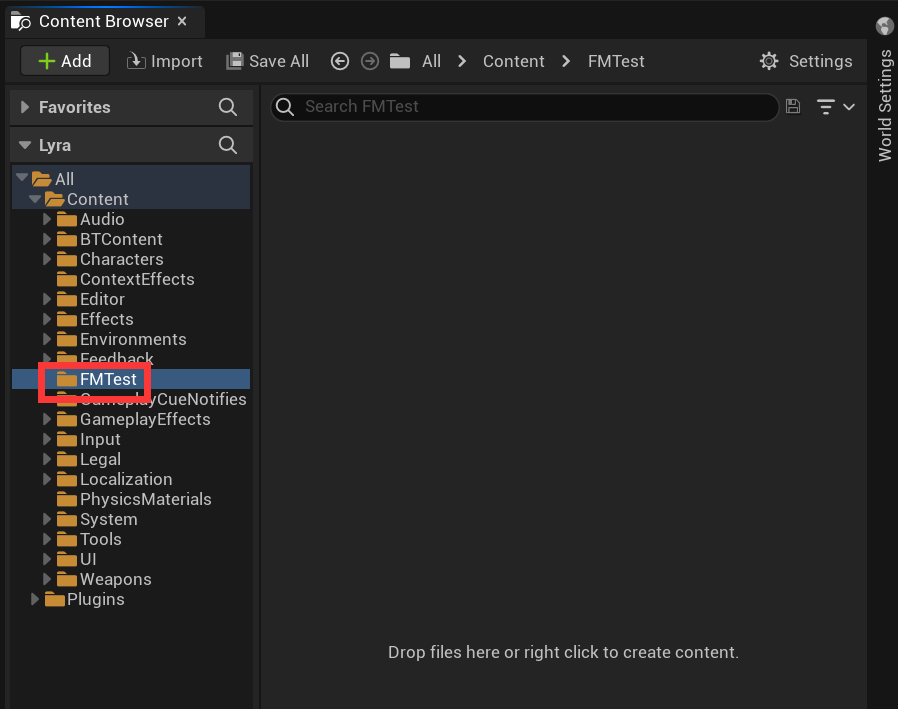
4、Create a new directory in the Content directory (in this tutorial, we will create a directory called FMTest), where we will place integrated related assets.
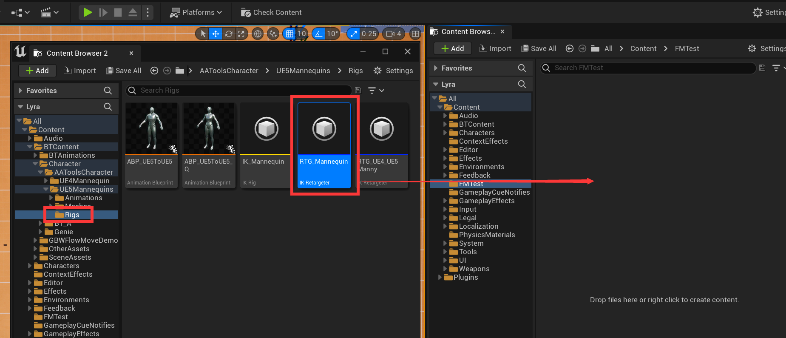
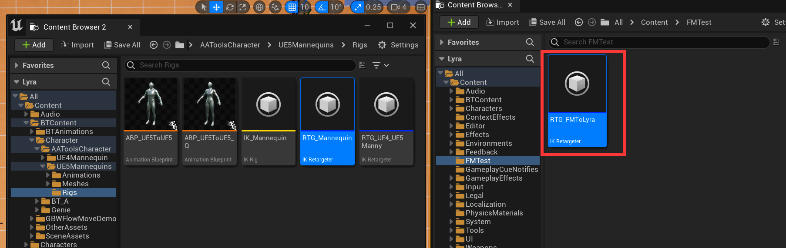
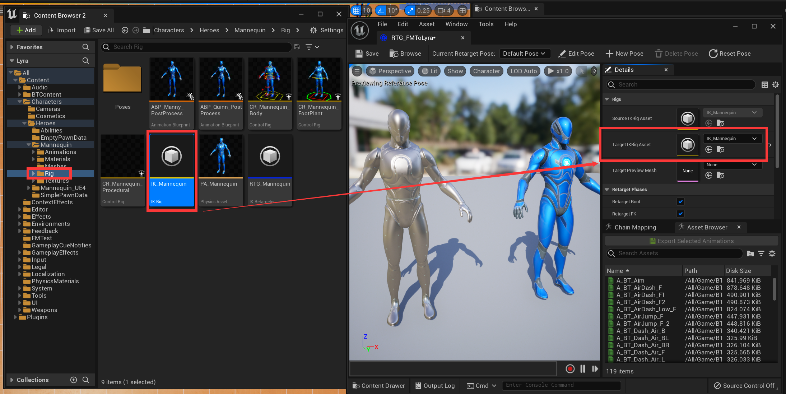
5、Find the asset named "RTG_Mannequin" at the location shown in the following figure and copy it to the FMTest directory. In this tutorial, I renamed it "RTG_ FMToLyra ".
6、Open "RTG_ FMToLyra ", as shown in the following figure, set TargetIKRigAsset to the asset named "IK_Mannequin" in Lyra. (Remember to save after setting)
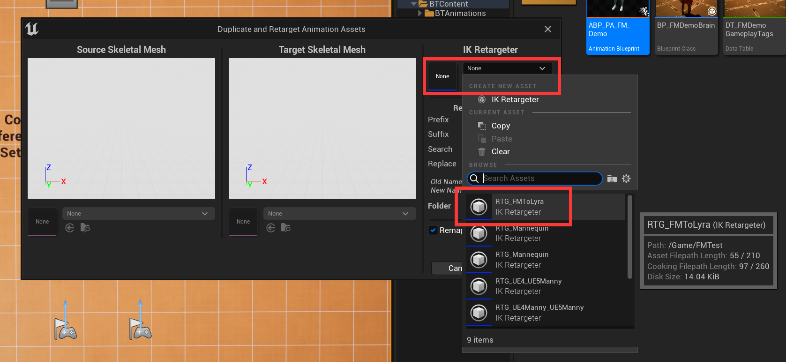
7、As shown in the following figure, locate the "ABP_PA_FM_Demo" animation blueprint, right-click on it, select retarget and copy.

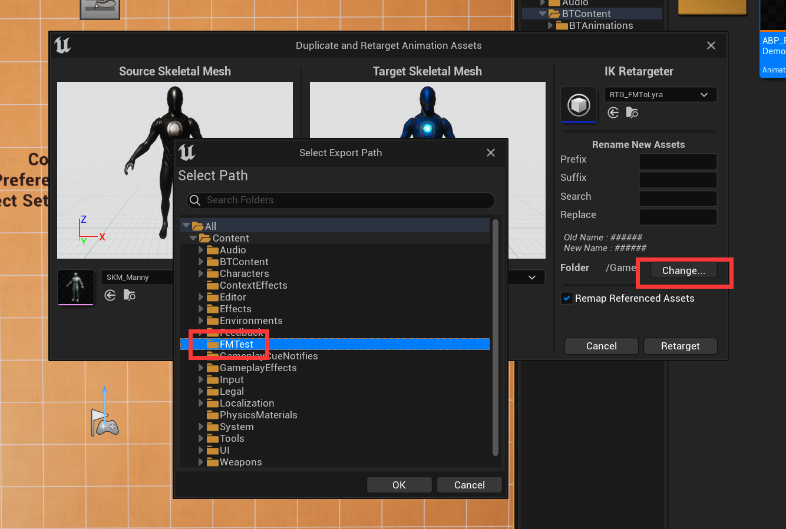
8、Set the IkRetargeter option to RTG_FMToLyra as shown in the following figure. And set the Folder to the FMTest folder. Finally, click on the Retarget button.
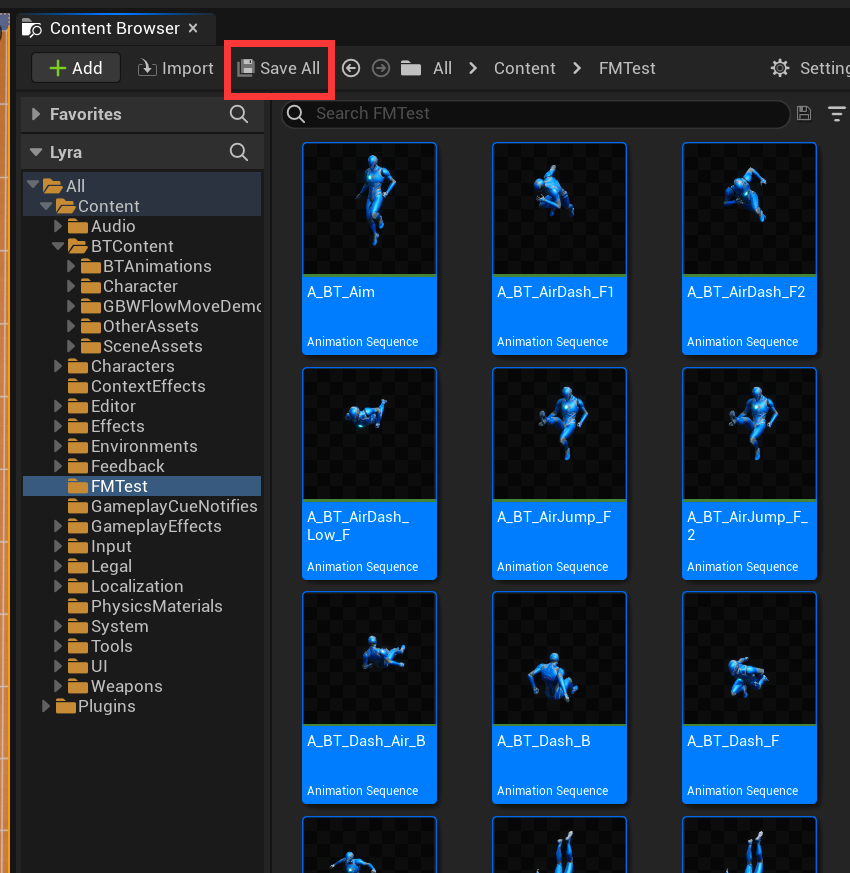
9、After completing the operation, click the Save All button to save the newly generated asset.
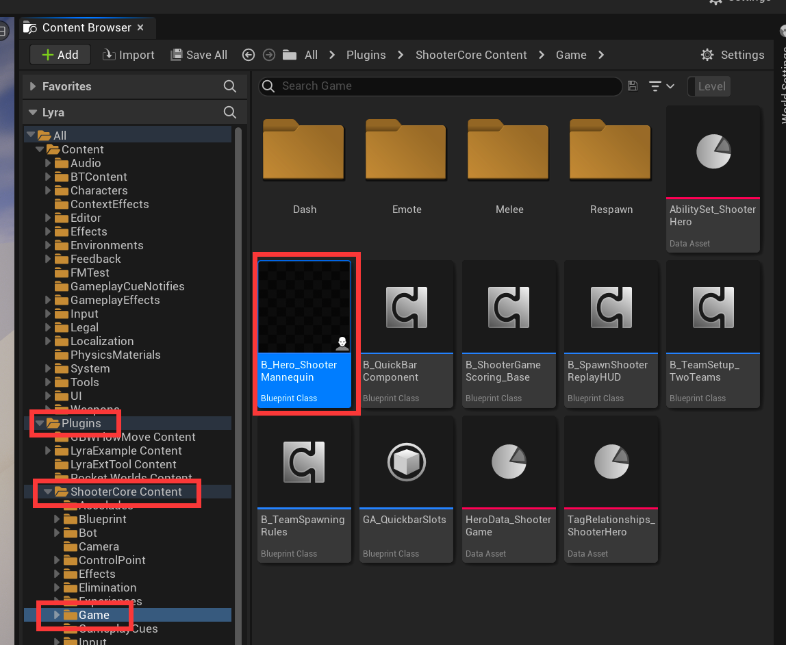
10、Find the B_Hero_ShooterMannequin asset in the Plugins ->ShooterCoreContent ->Game folder and open it.
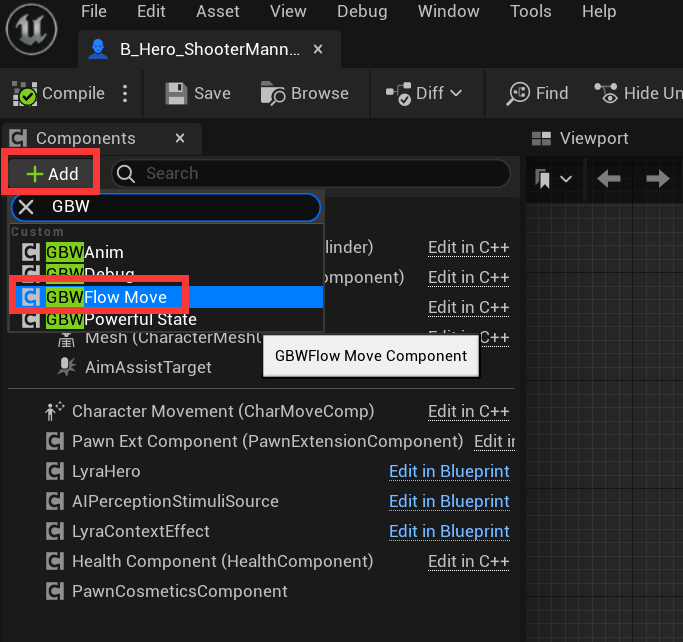
11、Add a FlowMove component to the character.
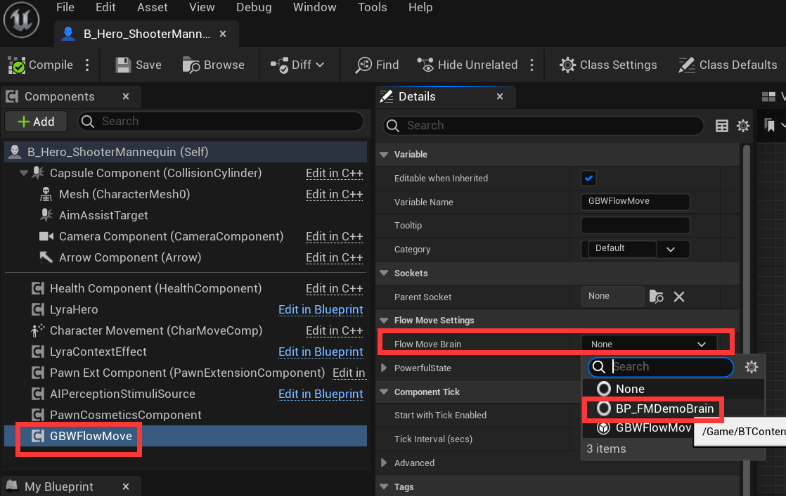
12、Select the FlowMove component and set the FlowMoveBrain as shown in the following figure.
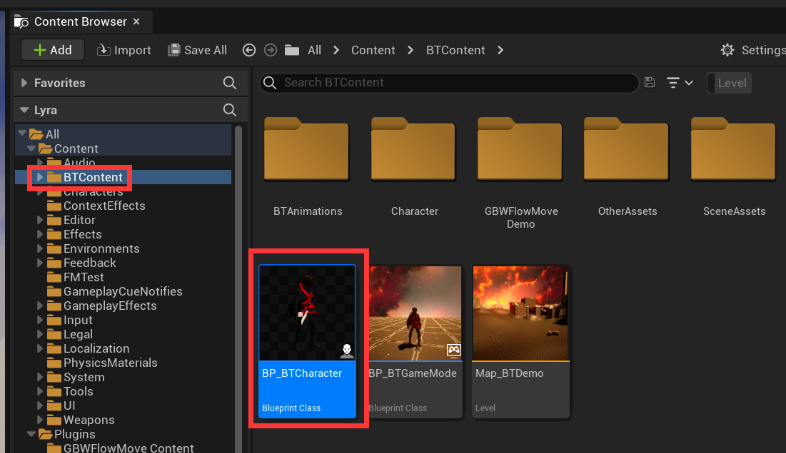
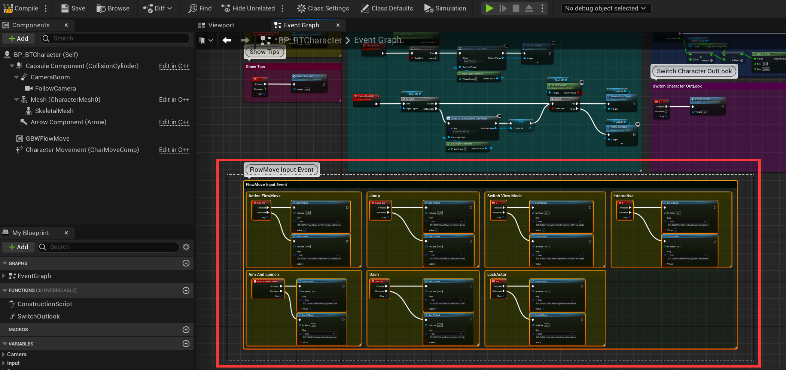
13、Find 'BP_BTCharacter' in the BTContent directory and open it.
14、Ignore compilation warnings due to missing input configuration. Select the nodes 'FlowMove Input Event' as shown in the following figure and copy them using CTRL+C.
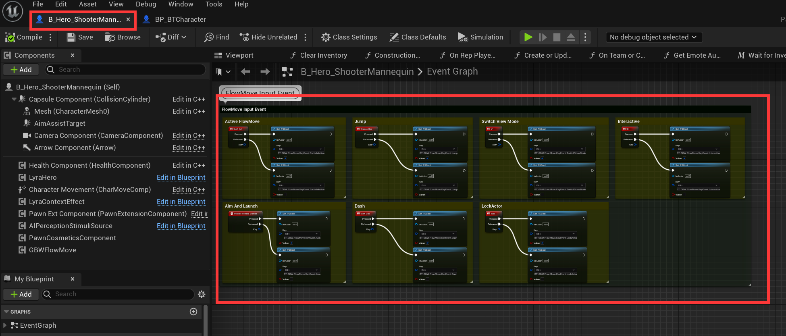
15、Back to B_ Hero_ ShooterMannequin character blueprint and paste the nodes copied in the previous step into the character blueprint.
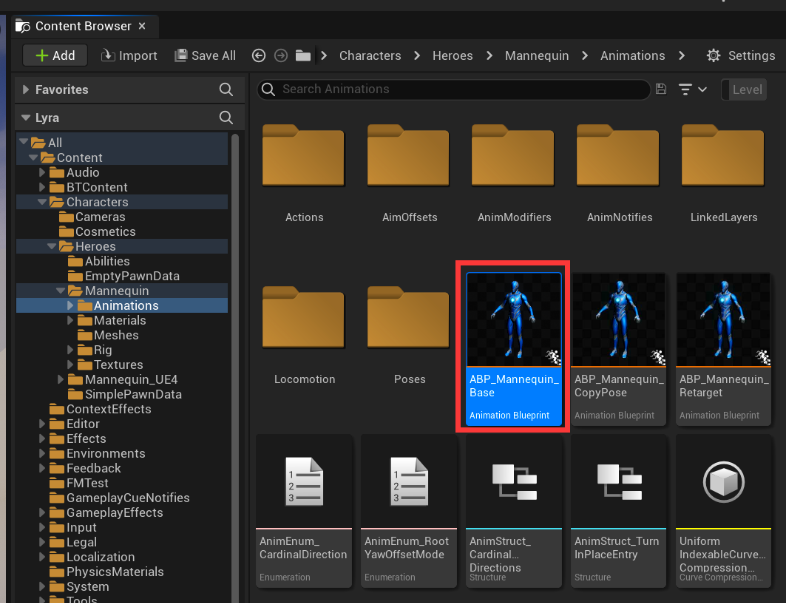
16、Select the Mesh component in the B_Hero_ShooterMannequin character blueprint and find the "ABP_Mannequin_Base" animation blueprint in the file browser by clicking the button shown in the following figure.

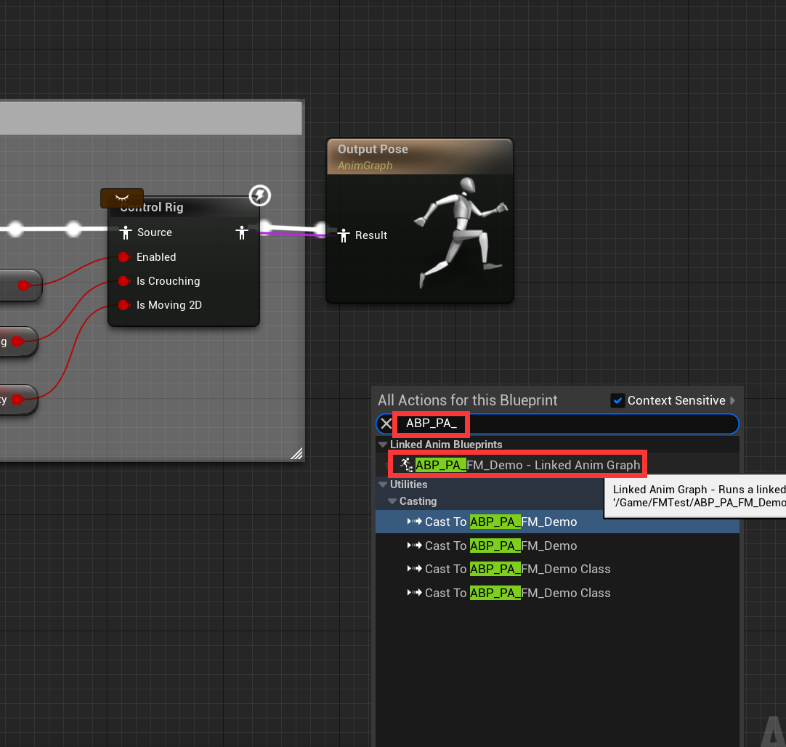
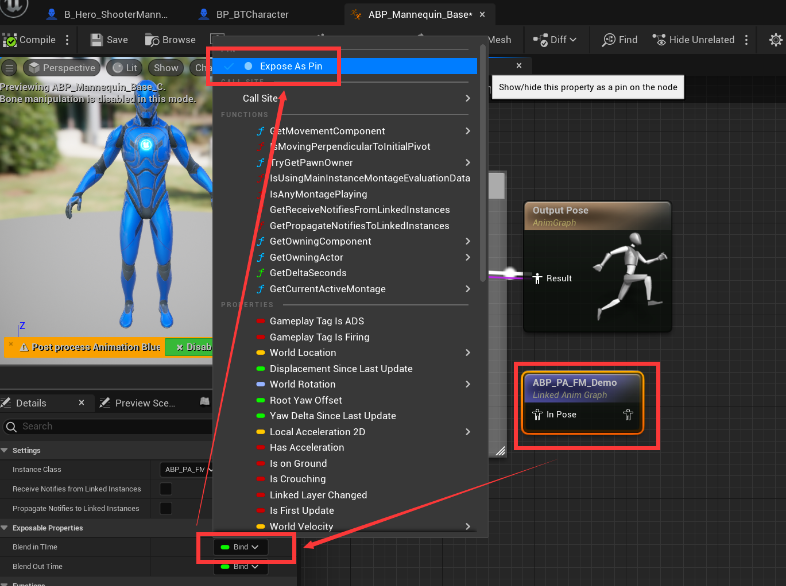
17、Open the "ABP_Mannequin_Base" animation blueprint. Before the Output Pose node, add a LinkedAnimGraph node named "ABP_PA_FM_Demo" as shown in the following figure.


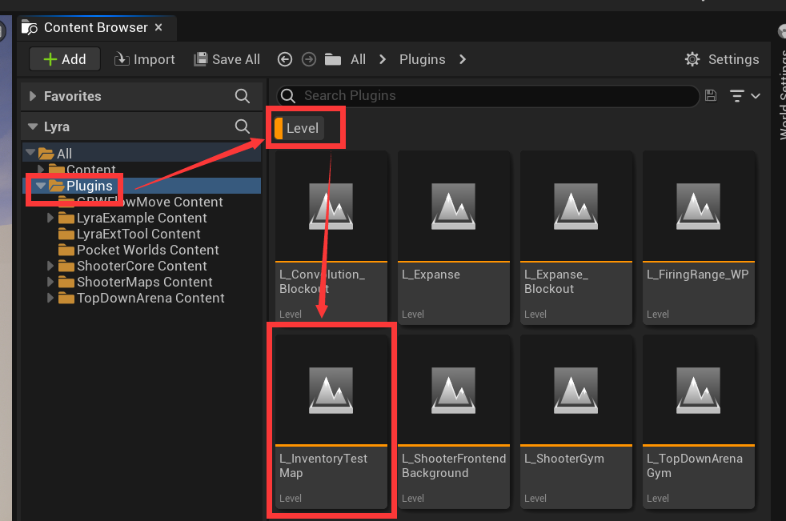
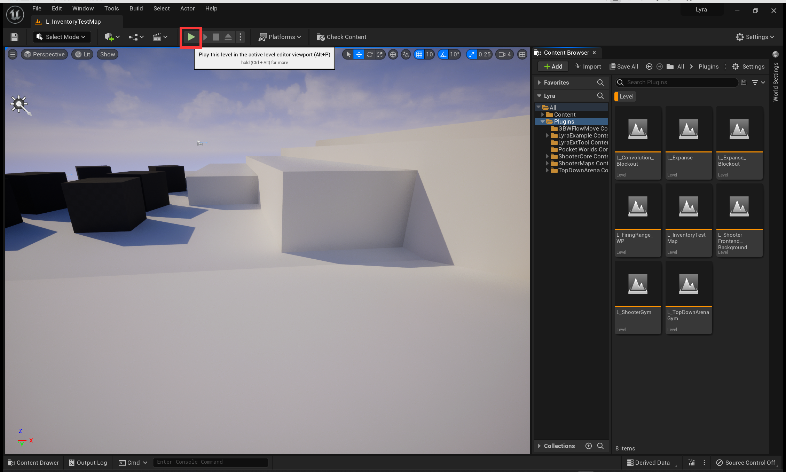
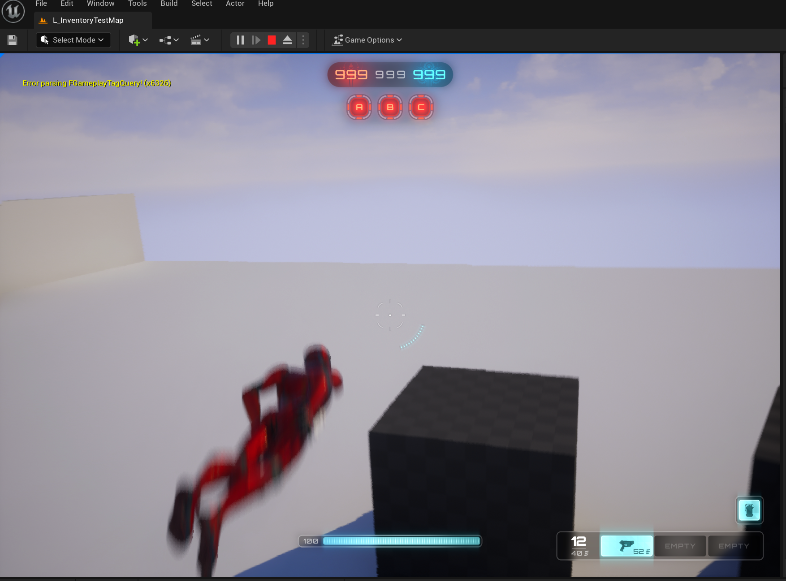
18、Find the level named "L_InventoryTestMap" as shown in the following figure and open it. Click on the Play button. Press the Ctrl key while the character is moving, and your character will have the FlowMove ability. Please enjoy it!